细小知识点

开发中容易忽略并且比较重要的一些细小的知识点, 记录下来方便以后查阅, 本文会持续更新.

iOS跳转定位系统设置

OC:

1
2
3
4
5
NSURL *url = [NSURL URLWithString:UIApplicationOpenSettingsURLString];
    if ([[UIApplication sharedApplication] canOpenURL:url])    
    {    
      [[UIApplication sharedApplication] openURL:url]; 
    }

swift:

1
2
3
4
5
6
let url = URL(string: UIApplication.openSettingsURLString)
    if UIApplication.shared.canOpenURL(url! ) {
        UIApplication.shared.open(url!, options: [ : ], completionHandler: nil)
    }


使用tableview的第一行作为header,点击时判断第一行的快捷方法:

1
2
3
4
  override func tableView(_ tableView: UITableView, willSelectRowAt indexPath: IndexPath) -> IndexPath? {
  //如果是第一行不响应
    return indexPath.section == 0 ? nil : indexPath
  }

两个并排的label如何让其中一个有限完全展示

常规约束设置如下

label1.snp.makeConstraints { (make) in make.leading.equalTo(12) make.top.equalTo(100) } label2.snp.makeConstraints { (make) in make.leading.equalTo(label1.snp.trailing) make.top.equalTo(100) make.trailing.equalTo(-12) }

但是我们希望有限展示完黄色的label,那么我们可以这么做,设置控件的抗压缩因素:

1
2
//代表控件拒绝压缩内置空间的优先级。优先级越高,控件的内置空间会越不容易被压缩。
label2.setContentCompressionResistancePriority(.required, for: .horizontal)

设置之后如下图:

另外还有一个抗拉伸因素:

1
2
//setContentHuggingPriority可以通俗理解成“别扯我”的优先级,优先级越高,越不能被扯长
 label2.setContentHuggingPriority(.required, for: .horizontal)

使用Instruments调试的时候,无法定位到xcode代码

解决办法: Build Options > Debug Information Format >选择debug 中DWARF with dSYM File

读取PDF的多种方式

  • 使用UIWebView读取PDF
  • 使用第三方框架读取, 推荐使用Reader

如果PDF为加密文档, 使用UIWebView方式读取会自动弹框要求输入密码, 如下图:

图片1

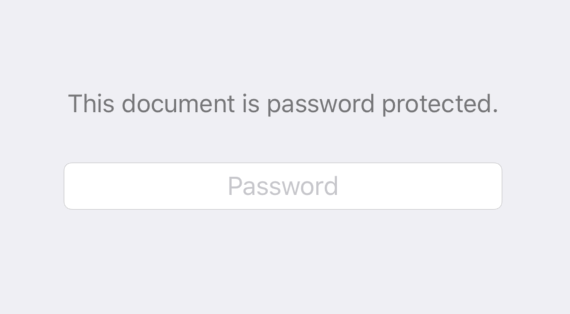
使用框架Reader解析PDF是直接将PDF绘制出来, 界面不会弹出输入密码的界面, 而是需要开发者在代码中输入密码, 对用户来说无法感知此PDF是否经过密码加密.

Swift读取plist文件,然后使用SwiftyJson转化成json

1
2
3
4
5
6
7
8
   /// 获取首页cell的所有样式
	    ///
	    /// - Returns: -
	    func cells() -> JSON {
	        let path = Bundle.main.path(forResource: "HomeViews", ofType: "plist")!
	        let arr = NSArray(contentsOfFile: path)
	        return JSON(arr as Any)
	    }

UITableView使用block删除或者插入cell时, cell绑定的indexPath不对造成的越界问题

写法:

1
2
3
4
5
6
7
	//让cell持有自己的下标
  cell.cellIndexPath = indexPath
  //删除后回传下标, 然后删除对应的数据源和cell
  cell.didDeleteItem = { cellIndexPath in
            data.remove(at: cellIndexPath.row)
            tableView.deleteRows(at: [cellIndexPath], with: .left)
        }

原因: cell所持有的indexPath在删除一个cell后没有及时变更, 造成cell的indexPath不准确. 正确做法:通过 tableView.indexPath(for: cell) 来获取准确的cell下标, 代码如下

1
2
3
4
5
6
//不让cell持有自己的下标, 而是通过 `tableView.indexPath(for: cell)` 实时获取
cell.didDeleteItem = { _ in
   				  let cellIndexPath =  tableView.indexPath(for: cell)
	            data.remove(at: cellIndexPath.row)
	            tableView.deleteRows(at: [cellIndexPath], with: .left)
	        }

swift如何声明只读属性

  • 方法一: 使用 private(set) 修饰属性

    1
    2
    3
    4
    5
    6
    7
    8
    9
    10
    11
      class ReadOnly {
      private(set) var name: String
    	
      init(_ name: String) {
          self.name = name
      }
      }
    	
      let obj = ReadOnly.init("hah")
      //以下代码会报错
      obj.name = "hahh"
    
  • 方法二: 使用计算属性

    1
    2
    3
    4
    5
    6
    7
      class ReadOnly {
      var name: String {
          get {
              return ""
          }
       }
      }
    

    Slicing (点九图)

参考资料

Swift 和 OC 混编注意事项

OC不能继承Swift的类

OC不能使用Swift的结构体

OC中定义为readonly的属性, 如果重写了get方法, 那么系统不会自动给我们生成成员变量, 我们要手动去生成, 生成方式有如下两种

  • @dynamic 属性名 = _属性名

  • 直接定义成员变量 {Class *_属性名}

有没有定义想屏幕宽度, 高度等常量, 因为常量是不变的, 即使屏幕旋转他们也不会变化, 如果你的布局依赖这些常量, 屏幕旋转的时候一定要注意, 例如

1
2
这样定义的是常量, 在屏幕旋转的时候UIScreen的值变化, 但是kScreenWidth不会变化, 导致布局错误
//let kScreenWidth = UIScreen.main.bounds.width

autoresizingMask容易被误解

  • flexibleLeftMargin 左边自适应, 保证右边和俯视图对齐

  • flexibleWidth 宽度自适应, 保证左右和俯视图对齐

  • flexibleRightMargin 右边自适应, 保证左边和俯视图对齐

  • flexibleTopMargin 顶边自适应, 保证底边和俯视图对齐

  • flexibleHeight 高度自适应, 保证顶, 底边和俯视图对齐

  • flexibleBottomMargin 底边自适应, 保证顶边和俯视图对齐

UIVisualEffectView

通常要想创建一个特殊效果(如blur效果),可以创建一个UIVisualEffectView视图对象,这个对象提供了一种简单的方式来实现复杂的视觉效果。这个可以把这个对象看作是效果的一个容器,实际的效果会影响到该视图对象底下的内容,对添加到该视图对象的contentView中的内容不会有模糊效果。

我们举个例子来看看如果使用UIVisualEffectView:

1
2
3
4
5
6
7
8
9
//背景图
let bgView: UIImageView = UIImageView(image: UIImage(named: "visual"))
bgView.frame = self.view.bounds
self.view.addSubview(bgView)
//模糊效果
let blurEffect: UIBlurEffect = UIBlurEffect(style: .Light)
let blurView: UIVisualEffectView = UIVisualEffectView(effect: blurEffect)
blurView.frame = CGRectMake(50.0, 50.0, self.view.frame.width - 100.0, 200.0)
self.view.addSubview(blurView)

这段代码是在当前视图控制器上添加了一个UIImageView作为背景图。然后在视图的一小部分中使用了blur效果。

我们可以看到UIVisualEffectView还是非常简单的。需要注意是的,不应该直接添加子视图到UIVisualEffectView视图中,而是应该添加到UIVisualEffectView对象的contentView中。

另外,尽量避免将UIVisualEffectView对象的alpha值设置为小于1.0的值,因为创建半透明的视图会导致系统在离屏渲染时去对UIVisualEffectView对象及所有的相关的子视图做混合操作。这不但消耗CPU/GPU,也可能会导致许多效果显示不正确或者根本不显示。

我们在上面看到,初始化一个UIVisualEffectView对象的方法是UIVisualEffectView(effect: blurEffect),其定义如下:

init(effect effect: UIVisualEffect) 这个方法的参数是一个UIVisualEffect对象。我们查看官方文档,可以看到在UIKit中,定义了几个专门用来创建视觉特效的,它们分别是UIVisualEffect、UIBlurEffect和UIVibrancyEffect。它们的继承层次如下所示:

1
2
3
4
NSObject
| -- UIVisualEffect
    | -- UIBlurEffect
    | -- UIVibrancyEffect


UIVisualEffect是一个继承自NSObject的创建视觉效果的基类,然而这个类除了继承自NSObject的属性和方法外,没有提供任何新的属性和方法。其主要目的是用于初始化UIVisualEffectView,在这个初始化方法中可以传入UIBlurEffect或者UIVibrancyEffect对象。

一个UIBlurEffect对象用于将blur(毛玻璃)效果应用于UIVisualEffectView视图下面的内容。如上面的示例所示。不过,这个对象的效果并不影响UIVisualEffectView对象的contentView中的内容。

UIBlurEffect主要定义了三种效果,这些效果由枚举UIBlurEffectStyle来确定,该枚举的定义如下:

1
2
3
4
5
6
//iOS10 以后新增了三种效果, 可以试试
enum UIBlurEffectStyle : Int {
    case ExtraLight
    case Light
    case Dark
}

与UIBlurEffect不同的是,UIVibrancyEffect主要用于放大和调整UIVisualEffectView视图下面的内容的颜色,同时让UIVisualEffectView的contentView中的内容看起来更加生动。通常UIVibrancyEffect对象是与UIBlurEffect一起使用,主要用于处理在UIBlurEffect特效上的一些显示效果。接上面的代码,我们看看在blur的视图上添加一些新的特效,如下代码所示:

1
2
3
4
5
6
7
8
9
10
let vibrancyView: UIVisualEffectView = UIVisualEffectView(effect: UIVibrancyEffect(forBlurEffect: blurEffect))
vibrancyView.setTranslatesAutoresizingMaskIntoConstraints(false)
blurView.contentView.addSubview(vibrancyView)
var label: UILabel = UILabel()
label.setTranslatesAutoresizingMaskIntoConstraints(false)
label.text = "Vibrancy Effect"
label.font = UIFont(name: "HelveticaNeue-Bold", size: 30)
label.textAlignment = .Center
label.textColor = UIColor.whiteColor()
vibrancyView.contentView.addSubview(label)

vibrancy特效是取决于颜色值的。所有添加到contentView的子视图都必须实现tintColorDidChange方法并更新自己。需要注意的是,我们使用UIVibrancyEffect(forBlurEffect:)方法创建UIVibrancyEffect时,参数blurEffect必须是我们想加效果的那个blurEffect,否则可能不是我们想要的效果。

另外,UIVibrancyEffect还提供了一个类方法notificationCenterVibrancyEffect,其声明如下:

class func notificationCenterVibrancyEffect() -> UIVibrancyEffect! 这个方法创建一个用于通知中心的Today扩展的vibrancy特效。

参考

1
2
3
4
5
6
7
8
9
10
11
UIVisualEffectView Class Reference

UIVisualEffect Class Reference

UIBlurEffect Class Reference

UIVibrancyEffect Class Reference

UIVisualEffect – Swift Tutorial

iOS 8: UIVisualEffect

获取对应日期所在的月或者年的天数

1
2
3
4
5
let calender = Calendar(identifier: .gregorian)
//今年有几天
let year = calender.range(of: .day, in: .year, for: Date())!.count
//这个月有几天
let month = calender.range(of: .day, in: .month, for: Date())!.count

获取系统语言的方法

1
Locale.preferredLanguages[0]

url带有中文的解决方案

1
2
3
4
5
6
7
8
9
10
11
12
13
14
 		let web = UIWebView(frame: view.bounds)
        view.addSubview(web)
        let urlString = "http://www.baidu.com/s?wd=人"
        //带中文直接转成url为空, 必须将中文使用%转义
    
    /* 转义(%)  例如: 人 -> %E4%BA%BA
     .urlQueryAllowed: 转义URL中query部分
     .urlHostAllowed:转义服务器地址部分
     .urlPathAllowed:转义路径部分
     ...... 其他同理
     */
    let urlEncoding = urlString.addingPercentEncoding(withAllowedCharacters: .urlQueryAllowed)!
    guard let url = URL(string: urlEncoding) else {return}
    web.loadRequest(URLRequest(url: url))

内容能缩放的webview

1
2
web.scalesPageToFit = YES;
web.multipleTouchEnabled = YES;

swift中代理使用weak声明, 否则释放不了

1
 weak var delegate: HLLGesutreDelegate?

闭包中使用 [unowned self],防止循环引用, 使用unowned修饰的值一定有值

OC中消除警告的方法

1
2
3
4
#pragma clang diagnostic push
#pragma clang diagnostic ignored "-Warc-performSelector-leaks"
    [self performSelector:NSSelectorFromString(self.method) withObject:nil];
#pragma clang diagnostic pop

远程推送真机调试的时候能接收到通知, 打成IPA包后就收不到

解决办法: 一般测试打包选的时Hoc, 但是收不到推送, 选择最后一个就可以收到推送

字符串转换成时间会相差8小时

由于不同的时间计算方式导致的额, 解决方法: 使用世界时间

1
2
3
4
5
let formatter = DateFormatter()
formatter.locale = Locale(identifier: "zh")
formatter.dateFormat = "YYYYMMDD"
//设置时区
formatter.timeZone = TimeZone(abbreviation: "UTC")

正则匹配手机和固话

1
2
3
4
5
6
7
8
9
10
11
12
13
14
15
16
17
18
19
20
21
- (BOOL)validateMobile:(NSString *)mobile
{
    if (mobile.length <= 0) {
        return NO;
    }
    //手机号以13,14, 15,17,18开头,八个 \d 数字字符
    NSString *phoneRegex = @"^((13[0-9])|(14[5|7])|(15([0-3]|[5-9]))|(18[0,5-9])|(17[0-9]))\d{8}$";
    NSPredicate *phoneTest = [NSPredicate predicateWithFormat:@"SELF MATCHES %@",phoneRegex];
    return [phoneTest evaluateWithObject:mobile];
}

//固话验证
- (BOOL) validateTelphone:(NSString *)telphone{
   
       NSString *phoneRegex = @"\d{3}\d{8}|\d{4}\d{7,8}|\d{7,8}";
    
        NSPredicate *phoneTest = [NSPredicate predicateWithFormat:@"SELF MATCHES %@",phoneRegex];
    
       return [phoneTest evaluateWithObject:telphone];
    
    }

_BOOL

@class可连接使用

1
@class NSDictionary, NSInputStream, NSString;

通过url获取图片

1
2
3
4
5
  NSString *urlString = self.shareInfoModel.shareImgUrl;
    NSData *data = [NSData dataWithContentsOfURL:[NSURL  URLWithString:urlString]];
    UIImage *image = [UIImage imageWithData:data]; // 取得图片

    [message setThumbImage:image];

NSNumberFormatter简单用法

1
2
3
4
5
6
7
8
9
NSNumberFormatter *formatter = [[NSNumberFormatter alloc] init];
self.formatter.numberStyle = NSNumberFormatterNoStyle;
formatter.groupingSize = 4;
//如果设置为NO, 组的分隔符不会生效
formatter.usesGroupingSeparator = YES;
formatter.groupingSeparator = @" ";
NSNumber *num = [NSNumber numberWithLongLong:[accountTextField.text stringByReplacingOccurrencesOfString:@" " withString:@""].longLongValue];
formatter.usesGroupingSeparator = YES;
NSString *numStr = [formatter stringFromNumber:num];

UITextField和UITextView输入过程控制数字格式的正则

1
2
3
4
5
if (string.length == 0 || ([string isEqualToString:@"0"] && textField.text.length == 0)) {//删除
    return YES;
}
NSString *total = [textField.text stringByReplacingCharactersInRange:range withString:string];
return [total matchPositiveWithMaxValue:NSNotFound maxLength:NSNotFound decimalLength:2 integerLength:NSNotFound];

校验相机权限的方法

1
2
3
4
5
6
7
8
9
10
11
12
13
14
15
16
- (void)checkCameraStatus{
NSString *mediaType = AVMediaTypeVideo;//读取媒体类型
AVAuthorizationStatus authStatus = [AVCaptureDevice authorizationStatusForMediaType:mediaType];//读取设备授权状态
if(authStatus == AVAuthorizationStatusRestricted || authStatus == AVAuthorizationStatusDenied){
    UIAlertController *alertVC = [UIAlertController alertControllerWithTitle:@"提示" message:@"使用相机功能需要开启相机权限." preferredStyle:UIAlertControllerStyleAlert];
    UIAlertAction *actionCancel = [UIAlertAction actionWithTitle:@"取消" style:UIAlertActionStyleDefault handler:nil];
    UIAlertAction *actionOk = [UIAlertAction actionWithTitle:@"去开启相机权限" style:UIAlertActionStyleDefault handler:^(UIAlertAction * _Nonnull action) {
        NSURL *url = [NSURL URLWithString:UIApplicationOpenSettingsURLString];
        if ([[UIApplication sharedApplication] canOpenURL:url]) {
            [[UIApplication sharedApplication] openURL:url]; // iOS 9
        }
    }];
    [alertVC addAction:actionCancel];
    [alertVC addAction:actionOk];
    [self.lastViewControllerInStack presentViewController:alertVC animated:YES completion:nil];
} }

提高xcode编译速度的方法

1. 增加XCode执行的线程数

可以根据自己Mac的性能,更改线程数设置5:

1
defaults write com.apple.Xcode PBXNumberOfParallelBuildSubtasks 5

另外也有一个设置可以开启(显示比编译时间):

1
defaults write com.apple.dt.Xcode ShowBuildOperationDuration YES

XCode默认使用与CPU核数相同的线程来进行编译,但由于编译过程中的IO操作往往比CPU运算要多,因此适当的提升线程数可以在一定程度上加快编译速度。

2.将Debug Information Format改为DWARF

在工程对应Target的Build Settings中,找到 Debug Information Format这一项,将Debug时的DWARF with dSYM file 改为 DWARF。

这一项设置的是是否将调试信息加入到可执行文件中,改为DWARF后,如果程序崩溃,将无法输出崩溃位置对应的函数堆栈,但由于Debug模式下可以在XCode中查看调试信息,所以改为DWARF影响并不大。这一项更改完之后,可以大幅提升编译速度。

比如在目前本人负责的项目中,由于依赖了多个Target,所以需要在每个Target的Debug Information Format设置为DWARF。顺便提一下,如果通过Cocoapod引入第三方则Debug Information Format默认就是设置为DWARF的。

3.将Build Active Architecture Only改为Yes

在工程对应Target的Build Settings中,找到Build Active Architecture Only这一项,将Debug时的NO改为Yes。

这一项设置的是是否仅编译当前架构的版本,如果为NO,会编译所有架构的版本。需要注意的是,此选项在Release模式下必须为NO`,否则发布的ipa在部分设备上将不能运行。这一项更改完之后,可以显著提高编译速度。

备注: Debug Information Format和Link Time Optimizations可能会使调试模式出现各种问题,比如无法打印参数的值等,不建议更改

获取iOS设备ip地址

1
2
3
4
5
6
7
8
9
10
11
#import "CommonCrypto/CommonDigest.h"
#import <ifaddrs.h>

#import <SystemConfiguration/CaptiveNetwork.h>
#import <arpa/inet.h>
#import <net/if.h>
#define IOS_CELLULAR    @"pdp_ip0"
#define IOS_WIFI        @"en0"
#define IOS_VPN         @"utun0"
#define IP_ADDR_IPv4    @"ipv4"
#define IP_ADDR_IPv6    @"ipv6"

​ + (NSString *)getIPAddress:(BOOL)preferIPv4 { NSArray *searchArray = preferIPv4 ? @[ IOS_VPN @”/” IP_ADDR_IPv4, IOS_VPN @”/” IP_ADDR_IPv6, IOS_WIFI @”/” IP_ADDR_IPv4, IOS_WIFI @”/” IP_ADDR_IPv6, IOS_CELLULAR @”/” IP_ADDR_IPv4, IOS_CELLULAR @”/” IP_ADDR_IPv6 ] : @[ IOS_VPN @”/” IP_ADDR_IPv6, IOS_VPN @”/” IP_ADDR_IPv4, IOS_WIFI @”/” IP_ADDR_IPv6, IOS_WIFI @”/” IP_ADDR_IPv4, IOS_CELLULAR @”/” IP_ADDR_IPv6, IOS_CELLULAR @”/” IP_ADDR_IPv4 ] ;

1
2
3
4
5
6
7
8
9
10
11
12
13
14
15
16
17
18
19
20
21
22
23
24
25
26
27
28
29
30
31
32
33
34
35
36
37
    NSDictionary *addresses = [self getIPAddresses];
    NSLog(@"addresses: %@", addresses);
    
    __block NSString *address;
    [searchArray enumerateObjectsUsingBlock:^(NSString *key, NSUInteger idx, BOOL *stop)
     {
         address = addresses[key];
         //筛选出IP地址格式
         if([self isValidatIP:address]) *stop = YES;
     } ];
    return address ? address : @"0.0.0.0";
}
+ (BOOL)isValidatIP:(NSString *)ipAddress {
    if (ipAddress.length == 0) {
        return NO;
    }
    NSString *urlRegEx = @"^([01]?\d\d?|2[0-4]\d|25[0-5])\."
    "([01]?\d\d?|2[0-4]\d|25[0-5])\."
    "([01]?\d\d?|2[0-4]\d|25[0-5])\."
    "([01]?\d\d?|2[0-4]\d|25[0-5])$";
    
    NSError *error;
    NSRegularExpression *regex = [NSRegularExpression regularExpressionWithPattern:urlRegEx options:0 error:&error];
    
    if (regex != nil) {
        NSTextCheckingResult *firstMatch=[regex firstMatchInString:ipAddress options:0 range:NSMakeRange(0, [ipAddress length])];
        
        if (firstMatch) {
            NSRange resultRange = [firstMatch rangeAtIndex:0];
            NSString *result=[ipAddress substringWithRange:resultRange];
            //输出结果
            NSLog(@"%@",result);
            return YES;
        }
    }
    return NO;
}

​ + (NSDictionary *)getIPAddresses { NSMutableDictionary *addresses = [NSMutableDictionary dictionaryWithCapacity:8];

1
2
3
4
5
6
7
8
9
10
11
12
13
14
15
16
17
18
19
20
21
22
23
24
25
26
27
28
29
30
31
32
33
34
35
36
37
38
39
40
41
42
43
44
45
46
47
48
49
50
51
52
53
54
55
56
57
58
59
60
61
    // retrieve the current interfaces - returns 0 on success
    struct ifaddrs *interfaces;
    if(!getifaddrs(&interfaces)) {
        // Loop through linked list of interfaces
        struct ifaddrs *interface;
        for(interface=interfaces; interface; interface=interface->ifa_next) {
            if(!(interface->ifa_flags & IFF_UP) /* || (interface->ifa_flags & IFF_LOOPBACK) */ ) {
                continue; // deeply nested code harder to read
            }
            const struct sockaddr_in *addr = (const struct sockaddr_in*)interface->ifa_addr;
            char addrBuf[ MAX(INET_ADDRSTRLEN, INET6_ADDRSTRLEN) ];
            if(addr && (addr->sin_family==AF_INET || addr->sin_family==AF_INET6)) {
                NSString *name = [NSString stringWithUTF8String:interface->ifa_name];
                NSString *type;
                if(addr->sin_family == AF_INET) {
                    if(inet_ntop(AF_INET, &addr->sin_addr, addrBuf, INET_ADDRSTRLEN)) {
                        type = IP_ADDR_IPv4;
                    }
                } else {
                    const struct sockaddr_in6 *addr6 = (const struct sockaddr_in6*)interface->ifa_addr;
                    if(inet_ntop(AF_INET6, &addr6->sin6_addr, addrBuf, INET6_ADDRSTRLEN)) {
                        type = IP_ADDR_IPv6;
                    }
                }
                if(type) {
                    NSString *key = [NSString stringWithFormat:@"%@/%@", name, type];
                    addresses[key] = [NSString stringWithUTF8String:addrBuf];
                }
            }
        }
        // Free memory
        freeifaddrs(interfaces);
    }
    return [addresses count] ? addresses : nil;
}

+ (nullable NSString*)getCurrentLocalIP{
    NSString *address = nil;
    struct ifaddrs *interfaces = NULL;
    struct ifaddrs *temp_addr = NULL;
    int success = 0;
    // retrieve the current interfaces - returns 0 on success
    success = getifaddrs(&interfaces);
    if (success == 0) {
        // Loop through linked list of interfaces
        temp_addr = interfaces;
        while(temp_addr != NULL) {
            if(temp_addr->ifa_addr->sa_family == AF_INET) {
                // Check if interface is en0 which is the wifi connection on the iPhone
                if([[NSString stringWithUTF8String:temp_addr->ifa_name] isEqualToString:@"en0"]) {
                    // Get NSString from C String
                    address = [NSString stringWithUTF8String:inet_ntoa(((struct sockaddr_in *)temp_addr->ifa_addr)->sin_addr)];
                }
            }
            temp_addr = temp_addr->ifa_next;
        }
    }
    // Free memory
    freeifaddrs(interfaces);
    return address;
}

​ ​

获取运营商信息

1
2
3
4
5
6
7
8
9
10
11
12
13
14
15
16
17
18
19
20
21
22
23
24
// 获取运营商信息
+ (NSString *)getOperatorInfomation {
    CTTelephonyNetworkInfo *info = [[CTTelephonyNetworkInfo alloc] init];
    //NSLog(@"info = %@", info);
    CTCarrier *carrier = [info subscriberCellularProvider];
    //NSLog(@"carrier = %@", carrier);
    if (carrier == nil) {
        return @"不能识别";
    }
    NSString *code = [carrier mobileNetworkCode];
    if (code == nil) {
        return @"不能识别";
    }
    if ([code isEqualToString:@"00"] || [code isEqualToString:@"02"] || [code isEqualToString:@"07"]) {
        return @"移动运营商";
    } else if ([code isEqualToString:@"01"] || [code isEqualToString:@"06"]) {
        return @"联通运营商";
    } else if ([code isEqualToString:@"03"] || [code isEqualToString:@"05"]) {
        return @"电信运营商";
    } else if ([code isEqualToString:@"20"]) {
        return @"铁通运营商";
    }
    return @"不能识别";
}

UIWebview自定义UserAgent的方法:

下是错误的方法

1
2
3
4
5
6
7
8
9
10
11
12
13
14
15
16
17
18
19
20
- (BOOL)application:(UIApplication *)application didFinishLaunchingWithOptions:(NSDictionary *)launchOptions{
    
    UIWebView * tempWebView = [[UIWebView alloc] initWithFrame:CGRectZero];
    NSString * oldAgent = [tempWebView stringByEvaluatingJavaScriptFromString:@"navigator.userAgent"];
    NSString * newAgent = oldAgent;
    
    //不能直接整体替换所有的值
    if (![oldAgent isEqualToString:@"BocHbExyApp"])
    {
        newAgent = @"BocHbExyApp";
    }
    NSLog(@"new agent :%@", newAgent);
    
    //起作用的代码
    NSDictionary * dictionnary = [[NSDictionary alloc] initWithObjectsAndKeys:newAgent, @"UserAgent", nil];
    [[NSUserDefaults standardUserDefaults] registerDefaults:dictionnary];
    [[NSUserDefaults standardUserDefaults] synchronize];
    
    return YES;
}

正确方法如下:

1
2
3
4
5
6
7
8
9
   UIWebView * tempWebView = [[UIWebView alloc] initWithFrame:CGRectZero];
    NSString * oldAgent = [tempWebView stringByEvaluatingJavaScriptFromString:@"navigator.userAgent"];
    
    //要在原有agent后面拼接
    NSString * newAgent = [oldAgent stringByAppendingString:@"BocHbExyApp"];
    NSLog(@"new agent :%@", newAgent);
    NSDictionary * dictionnary = [[NSDictionary alloc] initWithObjectsAndKeys:newAgent, @"UserAgent", nil];
    [[NSUserDefaults standardUserDefaults] registerDefaults:dictionnary];
    [[NSUserDefaults standardUserDefaults] synchronize];

裁剪指定位置的圆角

OC

1
2
3
4
5
6
7
8
9
10
11
12
13
14
/**
 裁剪某几个圆角

 @param view 被裁减的view
 @param corners 裁剪的角
 @param cornerRadii 裁剪半径
 */
- (void)clipCornerOf:(UIView *)view byRoundingCorners:(UIRectCorner)corners cornerRadii:(CGSize)radii{
    UIBezierPath *maskPath = [UIBezierPath bezierPathWithRoundedRect: view.bounds byRoundingCorners: corners cornerRadii: radii];
    CAShapeLayer *maskLayer = [[CAShapeLayer alloc] init];
    maskLayer.frame = self.bgView.bounds;
    maskLayer.path = maskPath.CGPath;
    view.layer.mask = maskLayer;
}

Swift

1
2
3
4
5
6
7
8
9
10
11
12
13
/**
 裁剪某几个圆角

 @param view 被裁减的view
 @param corners 裁剪的角
 @par
      func clipCorner(of view: UIView, corners: UIRectCorner, radii:CGSize) -> Void {
  let path =  UIBezierPath(roundedRect: view.bounds, byRoundingCorners: corners, cornerRadii: radii)
    let shapeLayer = CAShapeLayer()
    shapeLayer.frame = view.bounds
    shapeLayer.path = path.cgPath
    view.layer.mask = shapeLayer
}

实例变量和属性良好使用习惯

1,在对象内部写入数据使用属性, 读取数据使用实例变量

2,在init 和 dealloc方法中只用是实例变量

3,使用过懒加载的,使用属性

对象的等同性判断

将汉字转化成拼音

1
2
3
4
5
6
7
8
9
10
+ (NSString *)phoneticFromChinese:(NSString *)chinese {
    NSMutableString *phonetic = [chinese mutableCopy];
   //带声调
    CFStringTransform((__bridge CFMutableStringRef)phonetic, NULL, kCFStringTransformMandarinLatin, NO);
    //不带声调
    CFStringTransform((__bridge CFMutableStringRef)phonetic, NULL, kCFStringTransformStripCombiningMarks, NO);
    
    NSLog(@"%@", phonetic);
    return [[phonetic uppercaseString] substringToIndex:1];
}

两种加载xib文件的性能对比

第一种:[[NSBundle mainBundle] loadNibNamed:@”DataExplainViewController” owner:self options:nil].lastObject;

第二种: UINib *uinib = [UINib nibWithNibName:@”DataExplainViewController” bundle:nil]; self.view = [uinib instantiateWithOwner:self options:nil].lastObject;

第一种加载方式是使用读取文件, 并没有将读取的信息缓存, 所以高频操作会有降低性能; 第二种加载方式将读取的文件缓存到了内存中。

xib中的External Object 和 Object

External Object 使用在xib中, Object使用在SB中。 External Object 只能通过 [[NSBundle mainBundle] loadNibNamed:@”PersonView” owner:self options:dict] 方法配置,具体配置方法如下:

1
2
3
4
5
6
7
8
9
10
11
1
2
3
4
5
6
7
8
9
10
11
//如下两个类必须值全局变量(external Object关联的类)
self.personHandler = [PersonHandler new];
self.sonHandler = [SonHandler new];
NSDictionary *para = @{
                       @"test":_personHandler,
                       @"son": _sonHandler,
                       };
NSDictionary *dict = @{
                       UINibExternalObjects:para
                       };
PersonView *p = [[NSBundle mainBundle] loadNibNamed:@"PersonView" owner:self options:dict].lastObject;

在xib中配置好external object 关联的类的class和 identifier之后就能将控件链接到此类中, 如果控件同事链接到了external Object类和控制器中, 那么但按钮事件触发是会同时调用。(可分别用来更新UI和实现业务逻辑)

Object只需要关联好类即可实现nsobject类和控件的关联

IB_DESIGNABLE  和 IBInspectable

1、IB_DESIGNABLE:能在xib上实时显示自定义view的效果 2、IBInspectable :能在xib的属性中控制自定义view的属性 3、使用方法如下:

1
2
3
4
5
6
1
2
3
4
5
6
@interface CircleView ()
@property (nonatomic, assign) IBInspectable CGFloat radius;
@property (nonatomic, assign) IBInspectable CGFloat lineWidth;
@property (nonatomic, strong) IBInspectable UIColor *lineColor;
@property (nonatomic, assign) IBInspectable CGPoint circleCenter;
@end

pushMeBaby编译报错解决办法

1
2
3
4
5
6
1
2
3
4
5
6
1)编译找到错误点
2)导入CoreServices.framework
3)将
#include <CoreServices/../Frameworks/CarbonCore.framework/Headers/MacTypes.h>
替换成
#include <MacTypes.h>

重写hitTest:withEvent:返回指定view

想让谁成为最合适的view就重写谁自己的父控件的hitTest:withEvent:方法返回指定的子控件,或者重写自己的hitTest:withEvent:方法 return self。但是,建议在父控件的hitTest:withEvent:中返回子控件作为最合适的view!

原因在于在自己的hitTest:withEvent:方法中返回自己有时候会出现问题。因为会存在这么一种情况:当遍历子控件时,如果触摸点不在子控件A自己身上而是在子控件B身上,还要要求返回子控件A作为最合适的view,采用返回自己的方法可能会导致还没有来得及遍历A自己,就有可能已经遍历了点真正所在的view,也就是B。这就导致了返回的不是自己而是触摸点真正所在的view。所以还是建议在父控件的hitTest:withEvent:中返回子控件作为最合适的view! 例如:whiteView有redView和greenView两个子控件。redView先添加,greenView后添加。如果要求无论点击那里都要让redView作为最合适的view(把事件交给redView来处理)那么只能在whiteView的hitTest:withEvent:方法中return self.subViews[0];这种情况下在redView的hitTest:withEvent:方法中return self;是不好使的!

“xxx.h” file not found 解决办法

解决方法: 打开 Project->Info->Configurations,查看Configurations里面Debug 和Release是否有为None的配置项, 如果有改正即可

Xcode10编译项目报错: library not found for -lstdc++.6.0.9

原因: 苹果在XCode10中移除了libstdc++(libstdc++.6、libstdc++6.0.9)库。 解决办法: 从xcode9中将这个库复制一份,放到xcode10的安装目录中, 然后重启.具体步骤如下:

模拟器

  • 在finder中打开应用程序,找到xcode的9的安装目录, 右键显示包内容->contents->developer->platforms->iphoneSimulator.platform->developer->sdks->iphoneSimulator.sdk->usr->lib, 最后在此目录中找到 libstdc++.6.0.9.tbd然后复制

  • 依照上述步骤找到xcode10的相同目录, 然后把复制的 libstdc++.6.0.9.tbd 粘贴进去
  • 重新启动xcode, 编译即可

注意: 以上只是解决了模拟器的编译问题, 真机的解决方式同上,

真机

  • 在finder中打开应用程序,找到xcode的9的安装目录, 右键显示包内容->contents->developer->platforms->iphoneOs.platform->developer->sdks->iphoneSimulator.sdk->usr->lib, 最后在此目录中找到 libstdc++.6.0.9.tbd然后复制

  • 依照上述步骤找到xcode10的相同目录, 然后把复制的 libstdc++.6.0.9.tbd 粘贴进去
  • 重新启动xcode, 编译即可

Xcode10.1 import头文件无法索引

1
Xcode --> File --> Workspace Settings --> Build System --> Legacy Build System

##删除文件之后编译不通过,但是根据报错路径找不到该文件,那么说明该文件已经被删除了

1
	Build input file cannot be found xxx(文件路径)

解决办法:

  • 找到项目的 项目名.xcodeproj 文件
  • 右键显示包内容找到 项目名.pbxproj 文件, 双击打开
  • 全局搜索错误提示路径中的文件名, 然后删掉找到的所有内容即可

##将资源拖入工程之后根据bundle路径找不到对应的资源文件. eg. 将icon.png拖入工程中, 然后通过 let path = Bundle.main.path(forResource: "icon.png", ofType: nil) 寻找资源, 发现 path = nil. 解决方法: 虽然文件添加到了工程中, 但是没有将其添加到 bundle resources 中, 只需要将其添加进去即可.

点击加号, 添加需要的资源

collectionView:(UICollectionView *)collectionView cellForItemAtIndexPath:(NSIndexPath *)indexPath方法不执行

可能原因:

  • 代理
  • 设置item的大小, 设置不准确也不会执行, 比如itemsize的高度或者宽度为负数
  • 注册

屏幕旋转界面控件尺寸布局不准确, 产生错乱

可能原因:

  • 有没有定义想屏幕宽度, 高度等常量, 因为常量是不变的, 即使屏幕旋转他们也不会变化, 如果你的布局依赖这些常量, 屏幕旋转的时候一定要注意, 例如

    1
    2
    //这样定义的是常量, 在屏幕旋转的时候UIScreen的值变化, 但是kScreenWidth不会变化, 导致布局错误
    //let kScreenWidth = UIScreen.main.bounds.width
    

    swift项目中, 使用pod导入OC库, 在桥接文件中导入报错

    eg, swift项目使用pod集成FMDB, 在桥接文件中 #import "FMDB.h" "FMDB.h" file not found.

解决办法按下图操作: 解决办法

在iOS9.3以上正常运行, 一下就在程序入口崩溃, 异常断点随机

可能原因:

在Xcode8中,如果你的图片资源文件里有16位图或者图片显示模式为P3,并且Deployment Target是iOS9.3以下的就会出现这个问题。(话说我公司的项目里面就出现了一个小按钮,导致了这次崩溃,不知道设计师是怎么弄出来的这个特殊图片…)如果你的App需要支持wide color functionality,那你就必须设置Deployment Target为iOS9.3以上。如果你的APP不需要支持wide color functionality并且你希望兼容iOS老版本,那么你需要将所有16-bit or P3 assets的图片转换为8-bit sRGB assets

定位到问题图片:

1.打一个ipa包,解压你的应用的ipa包,进入到你应用的Playload文件夹。

2.用find命令定位到Assets.car文件

find . -name 'Assets.car'

3.使用 assetutil 命令导出图片的信息存储到Assets.json文件中

sudo xcrun --sdk iphoneos assetutil --info Assets.car的文件路径 > 生成的Assets.json文件要保存到的路径

4.打开刚才生成的Assets.json文件,查找含有”DisplayGamut” : “P3”, “Encoding” : “ARGB-16″的内容。这个对应的Name就是出现问题的图片了。

1
2
3
4
5
6
7
8
9
10
11
12
13
14
15
16
{
    "SizeClass Vertical" : "universal",
    "Graphics" : "GLES2,0",
    "Name" : "ianisme.com",
    "Scale" : 2,
    "Idiom" : "universal",
    "Memory" : "512MB",
    "LayoutDirection" : "0 - Horizontal",
    "DisplayGamut" : "P3",
    "Encoding" : "ARGB-16",
    "SizeClass Horizontal" : "universal",
    "Image Type" : "kCoreThemeOnePartScale",
    "AssetType" : "Image",
    "Subtype" : 0,
    "EdgeInsets" : "top:0 left:0 bottom:0 right:0"
  },

正确的图片格式如下:

错误的图片格式可能如下:

app运行启动之后直接崩溃,错误描述如下

1
2
3
dyld: Library not loaded: @rpath/FLEX.framework/FLEX
  Referenced from: /Users/bochb/Library/Developer/CoreSimulator/Devices/C6D405AA-4A52-4C37-9FAA-71E5DD650F4F/data/Containers/Bundle/Application/9ED49699-BBB8-46C4-A96E-E0D360024E8A/UICatalog.app/UICatalog
  Reason: image not found

pod init出错, 错误如下

1
2
3
4
5
6
7
8
9
10
11
12
13
### Command

```
/usr/local/bin/pod init
```

### Report

* What did you do?

* What did you expect to happen?

* What happened instead?

​ ### Stack

1
2
3
4
5
6
7
8
9
10
11
12
13
14
15
16
17
18
19
20
21
22
23
24
25
26
27
28
29
30
31
32
33
34
35
36
37
38
39
40
41
42
43
44
45
46
47
48
49
50
51
52
53
54
55
56
57
58
59
60
61
62
63
64
65
66
```
   CocoaPods : 1.3.1
        Ruby : ruby 2.3.3p222 (2016-11-21 revision 56859) [universal.x86_64-darwin17]
    RubyGems : 2.5.2
        Host : Mac OS X 10.13.5 (17F77)
       Xcode : 9.2 (9C40b)
         Git : git version 2.14.3 (Apple Git-98)
Ruby lib dir : /System/Library/Frameworks/Ruby.framework/Versions/2.3/usr/lib
Repositories : master - https://github.com/CocoaPods/Specs.git @ e6bc4202cf9fb00bf0ed05ca6d3c2eba6d802935
```

### Plugins

```
cocoapods-deintegrate : 1.0.1
cocoapods-plugins     : 1.0.0
cocoapods-search      : 1.0.0
cocoapods-stats       : 1.0.0
cocoapods-trunk       : 1.3.0
cocoapods-try         : 1.1.0
```

### Error

```
RuntimeError - [Xcodeproj] Unknown object version.
/Library/Ruby/Gems/2.3.0/gems/xcodeproj-1.5.2/lib/xcodeproj/project.rb:217:in `initialize_from_file'
/Library/Ruby/Gems/2.3.0/gems/xcodeproj-1.5.2/lib/xcodeproj/project.rb:102:in `open'
/Library/Ruby/Gems/2.3.0/gems/cocoapods-1.3.1/lib/cocoapods/command/init.rb:41:in `validate!'
/Library/Ruby/Gems/2.3.0/gems/claide-1.0.2/lib/claide/command.rb:333:in `run'
/Library/Ruby/Gems/2.3.0/gems/cocoapods-1.3.1/lib/cocoapods/command.rb:52:in `run'
/Library/Ruby/Gems/2.3.0/gems/cocoapods-1.3.1/bin/pod:55:in `<top (required)>'
/usr/local/bin/pod:22:in `load'
/usr/local/bin/pod:22:in `<main>'
```

――― TEMPLATE END ――――――――――――――――――――――――――――――――――――――――――――――――――――――――――――――――

[!] Oh no, an error occurred.

Search for existing GitHub issues similar to yours:
https://github.com/CocoaPods/CocoaPods/search?q=%5BXcodeproj%5D+Unknown+object+version.&type=Issues

If none exists, create a ticket, with the template displayed above, on:
https://github.com/CocoaPods/CocoaPods/issues/new

Be sure to first read the contributing guide for details on how to properly submit a ticket:
https://github.com/CocoaPods/CocoaPods/blob/master/CONTRIBUTING.md

Don't forget to anonymize any private data!

Looking for related issues on cocoapods/cocoapods...
 - Pod init. Unknown object version
   https://github.com/CocoaPods/CocoaPods/issues/7907 [closed] [2 comments]
   3 weeks ago

 - RuntimeError - [Xcodeproj] Unknown object version.
   https://github.com/CocoaPods/CocoaPods/issues/7697 [closed] [27 comments]
   2 weeks ago

 - Unknown object version
   https://github.com/CocoaPods/CocoaPods/issues/7760 [closed] [1 comment]
   21 May 2018

and 41 more at:
https://github.com/cocoapods/cocoapods/search?q=[Xcodeproj]%20Unknown%20object%20version.&type=Issues&utf8=✓

解决办法一, 可能是由于Xcode安装最新的版本造成的, 在终端执行 gem install cocoapods 即可解决, 如果不能解决请使用方法二.

解决办法二,把Project Format修改成Xcode 8.0-compatible即可(此方法没有从根源解决问题, 比如Swift版本兼容的问题)。如下图

解决办法三, 升级cocoapods, 此方法可以从根源解决问题 执行 gem install cocoapods --pre 之后发现没啥卵用, 因为你的源不对,正确姿势如下:

1, 移除以前的源

查看源的方法: 执行 gem sources -l, 会看到源的地址, 然后执行 gem sources --remove 源地址, 即可删除原来的源

2, 添加新的源

gem sources --add 新源地址 这里的地址推荐使用 https://gems.ruby-china.org/ , 然后通过 gem sources -l 查看是否添加成功

3, 安装此源上最新的 cocoapods

gem install cocoapods

安装三方库之后无法导入头文件, 或者导入头文件后报找不到库的错, 特别是OC项目引入Swift库经常出现这种问题, 问题描述如下:

1
No such module 'Quick'

解决方法如下:

1,如果你已经运行了 pod install ,那么关闭并重新打开 Xcode workspace 。如果这样做还没解决问题,那么请接着进行下面的步骤。

2,删除 ~/Library/Developer/Xcode/DerivedData 整个目录,这里面包含了 ModuleCache 。

3,在 Manage Schemes 对话框中,勾选 Quick 、Nimble 、Pods-ProjectnameTests ,然后重新编译它们(Cmd+B)。

使用WebViewJavascriptBridge之后 webview不走代理方法

桥接会覆盖代理设置, 使用第三方多看注意一事项

按照如下方式代理不会生效

1
2
3
4
5
	self.web.delegate = self;
	//......
 [WebViewJavascriptBridge bridgeForWebView:self.web handler:^(id data, WVJBResponseCallback responseCallback) {
        NSLog(@"%@",responseCallback);
    }];

使用下面这种方式才会生效

1
2
3
 [WebViewJavascriptBridge bridgeForWebView:self.web webViewDelegate:self handler:^(id data, WVJBResponseCallback responseCallback) {
        NSLog(@"%@",responseCallback);
    }];

Cordava测试没错, 打包报错

1
ipa打包 'Cordova/CDVPlugin.h' file not found

解决办法:

1
2
3
最后,通过在 Build Settings -->  Search Paths -->  Header Search Paths 

添加:$(OBJROOT)/UninstalledProducts/$(PLATFORM_NAME)/include

使用沙盒缓存后, 重装app确取不到缓存(知识点正确, 但是不可能出现此种情况)

代码如下:

1
2
3
4
5
6
7
8
9
10
11
12
13
14
15
16
17
//获取沙河路径
NSString *UserDataPath = [NSSearchPathForDirectoriesInDomains(NSDocumentDirectory, NSUserDomainMask, YES) objectAtIndex:0]
NSString *pathStr = [UserDataPath stringByAppendingPathComponent:NSStringFromClass([self class])];

NSFileManager *fileManage = [NSFileManager defaultManager];

 //判断是否存在该文件   
if ([fileManage fileExistsAtPath:pathStr]) {
BaseModel *model = [NSKeyedUnarchiver unarchiveObjectWithFile:pathStr];
if (!model) {
NSLog(@"缓存存在,解档失败,返回nil");
    
} else {
NSLog(@"缓存存在,解档成功,返回%@ : %p",[self class], &model);
   
}
}

原因: iOS8之后,苹果添加的新特性,将每次打开app内的沙盒重新生成,并保持上一次的沙盒文件(Documents、Library、tmp)移到新生成的文件内,旧文件删除,就是说,你保存的文件都在,只不过每次打开后,都会有一个新的绝对路径。

所以,使用NSSearchPathForDirectoriesInDomains获取沙河地址时,每次app重新运行都会生成一个不同的的路径。因为苹果现在的沙盒的保护机制。会不断的变化. 示例如下:

1
2
3
 /var/mobile/Containers/Data/Application/70937065-E1E0-4CD3-908C-B4848B9243A2/Documents/HomeModel

/var/mobile/Containers/Data/Application/A21CBDDB-374C-41FE-9F65-9AC90FE6103F/Documents/HomeModel

其中, 那一串字符串会随机变化. 所以在使用NSFileManager判断文件是否存在, 是找不到换存文件的. 我们只需将NSFileManager判断文件是否存在的代码删掉即可.

正确的代码如下:

1
2
3
4
5
6
7
8
9
10
11
12
//获取沙河路径
NSString *UserDataPath = [NSSearchPathForDirectoriesInDomains(NSDocumentDirectory, NSUserDomainMask, YES) objectAtIndex:0]
NSString *pathStr = [UserDataPath stringByAppendingPathComponent:NSStringFromClass([self class])];
//解档
BaseModel *model = [NSKeyedUnarchiver unarchiveObjectWithFile:pathStr];
if (!model) {
NSLog(@"缓存存在,解档失败,返回nil");
    
} else {
NSLog(@"缓存存在,解档成功,返回%@ : %p",[self class], &model);
   
}

运行直接崩溃

1
2
3
4
dyld: Symbol not found: _NSDictionary0 
Referenced from: /private/var/mobile/Containers/Bundle/Application/4420F418-8474-4522-9F18-7C539794080C/YXTDownloaderDemo.app/YXTDownloaderDemo 
Expected in: /System/Library/Frameworks/CoreFoundation.framework/CoreFoundation 
in /private/var/mobile/Containers/Bundle/Application/4420F418-8474-4522-9F18-7C539794080C/YXTDownloaderDemo.app/YXTDownloaderDemo

真机调试的时候显示这个问题, 版本低的尤其会出现 需要在link binary with library 里面添加 corefoundation.framework 选择option

打电话,录音时由于状态栏变化会是布局改变,

解决办法: 不适用固定的屏幕尺寸(例如宏定义屏幕的宽高等), 而是使用控制器view的宽高, 如果还有不能适配的地方可以监听状态栏变化的通知

同时: 状态栏也会影响启动图

解决办法:启动时隐藏状态栏

引入.mm文件编译报错, 而且错误莫名奇妙, 什么runtime balabala

可能原因: 自己定义的宏名与系统函数重名, 比如NSLog函数

解决办法: 修改重名宏即可

引入.c文件报很多莫名错误, 各种runtime错误

将.c 改为.m即可

pushMeBaby编译报错解决办法

1
2
3
4
5
6
1
2
3
4
5
6
1)编译找到错误点
2)导入CoreServices.framework
3)将
#include <CoreServices/../Frameworks/CarbonCore.framework/Headers/MacTypes.h>
替换成
#include <MacTypes.h>

webview支持缩放的方法

1
2
3
4
 //支持缩放
    self.web.scalesPageToFit = YES;
    self.web.multipleTouchEnabled = YES;
    self.web.userInteractionEnabled = YES;

webView 去掉黑边的方法

1
2
_web.opaque = NO;
  _web.backgroundColor = [UIColor whiteColor];

合并模拟器和真机静态库

分别编译模拟器和真机的静态库,然后使用终端合并, $lipo -create 1.a 2.a -output name.a 最终生成真机和模拟器都能用的 name.a 静态库

查询静态库信息

1
$lipo -info 静态库路径

将错误信息发送到指定邮箱

在appDelegate中写此方法: 会将bug以邮件的方式放送给指定的邮箱

1
2
3
4
5
6
7
8
9
10
11
12
13
14
15
16
17
18
19
20
21
22
23
24
25
26
27
28
29
30
31
32
33
34
35
36
37
38
39
40
41
42
43
44
45
46
47
48
49
50
51
52
53
54
55
56
57
58
59
60
61
62
63
64
65
66
67
68
69
70
71
72
73
74
75
76
77
78
79
80
81
82
83
84
85
86
87
88
89
90
91
92
#pragma mark - BUG统计
- (void)redirectNSLogToDocumentFolder
{
    //如果已经连接Xcode调试则不输出到文件
    if (isatty(STDOUT_FILENO)) {
        return;
    }
    
    //判定如果是模拟器就不输出
    UIDevice *device = [UIDevice currentDevice];
    if ([[device model]hasSuffix:@"Simulator"]) {
        return;
    }
    
    //将NSLog打印信息保存到Document目录下的Log文件夹下
    NSArray *paths = NSSearchPathForDirectoriesInDomains(NSDocumentDirectory, NSUserDomainMask, YES);
    NSString *logDirectory = [[paths objectAtIndex:0]stringByAppendingPathComponent:@"Log"];
    NSFileManager *fileManager = [NSFileManager defaultManager];
    BOOL fileExists = [fileManager fileExistsAtPath:logDirectory];
    if (!fileExists) {
        NSError *error = nil;
        [fileManager createDirectoryAtPath:logDirectory withIntermediateDirectories:YES attributes:nil error:&error];
        if (error) {
            NSLog(@"error = %@",[error localizedDescription]);
        }
    }
    
    NSDateFormatter *formatter = [[NSDateFormatter alloc]init];
    [formatter setLocale:[[NSLocale alloc]initWithLocaleIdentifier:@"zh_CN"]];
    [formatter setDateFormat:@"yyyy-MM-dd HH:mm:ss"];
    //每次启动都保存一个新的日志文件中
    NSString *dateStr = [formatter stringFromDate:[NSDate date]];
    NSString *logFilePath = [logDirectory stringByAppendingFormat:@"/%@.log",dateStr];
    
    //将log文件输出到文件
    freopen([logFilePath cStringUsingEncoding:NSASCIIStringEncoding], "a++", stdout);
    freopen([logFilePath cStringUsingEncoding:NSASCIIStringEncoding], "a++", stderr);
    //捕获Object-C异常日志
    
    NSSetUncaughtExceptionHandler(&UncaughtExceptionHandler);
}

#pragma mark - 异常处理
void UncaughtExceptionHandler(NSException* exception)
{
    NSString *name = [exception name];
    NSString *reason = [exception reason];
    NSArray *symbols = [exception callStackSymbols];
    //异常发生时的调用栈
    NSMutableString *strSymbols = [[NSMutableString alloc]init];
    //将调用栈平成输出日志的字符串
    for (NSString *str in symbols) {
        [strSymbols appendString:str];
        [strSymbols appendString:@"\r\n"];
    }
    //将crash日志保存到Document目录下的Log文件夹下
    NSArray *paths = NSSearchPathForDirectoriesInDomains(NSDocumentDirectory, NSUserDomainMask, YES);
    NSString *logDirectory = [[paths objectAtIndex:0]stringByAppendingPathComponent:@"Log"];
    
    NSFileManager *fileManager = [NSFileManager defaultManager];
    if (![fileManager fileExistsAtPath:logDirectory]) {
        NSError *error = nil;
        [fileManager createDirectoryAtPath:logDirectory withIntermediateDirectories:YES attributes:nil error:&error];
        if (error) {
            NSLog(@"error = %@",[error localizedDescription]);
        }
    }
    
    NSString *logFilePath = [logDirectory stringByAppendingPathComponent:@"UncaughtException.log"];
    
    NSDateFormatter *formatter = [[NSDateFormatter alloc]init];
    [formatter setLocale:[[NSLocale alloc]initWithLocaleIdentifier:@"zh_CN"]];
    [formatter setDateFormat:@"yyyy-MM-dd HH:mm:ss"];
    NSString *dateStr = [formatter stringFromDate:[NSDate date]];
    
    NSString *crashString = [NSString stringWithFormat:@",- %@ ->[Uncaught Exception]\r\nName:%@,Reason:%@\r\n[Fe Symbols Start]\r\n%@[Fe Symbols End]\r\n\r\n",dateStr,name,reason,strSymbols];
    
    //把错误日志写到文件中
    if (![fileManager fileExistsAtPath:logFilePath]) {
        [crashString writeToFile:logFilePath atomically:YES encoding:NSUTF8StringEncoding error:nil];
    }else{
        NSFileHandle *outFile = [NSFileHandle fileHandleForWritingAtPath:logFilePath];
        [outFile seekToEndOfFile];
        [outFile writeData:[crashString dataUsingEncoding:NSUTF8StringEncoding]];
        [outFile closeFile];
    }
    
    //把错误日志发送到邮箱
    NSString *urlStr = [NSString stringWithFormat:@"mailto://objc_china@163.com?subject=bug&body=感谢您的配合错误详情:%@",crashString];
    NSURL *url = [NSURL URLWithString:[urlStr stringByAddingPercentEscapesUsingEncoding:NSUTF8StringEncoding]];
    [[UIApplication sharedApplication]openURL:url];
}

IB_DESIGNABLE  和 IBInspectable

1、IB_DESIGNABLE:能在xib上实时显示自定义view的效果

2、IBInspectable :能在xib的属性中控制自定义view的属性

3、使用方法如下:

1
2
3
4
5
6
1
2
3
4
5
6
@interface CircleView ()
@property (nonatomic, assign) IBInspectable CGFloat radius;
@property (nonatomic, assign) IBInspectable CGFloat lineWidth;
@property (nonatomic, strong) IBInspectable UIColor *lineColor;
@property (nonatomic, assign) IBInspectable CGPoint circleCenter;
@end

xib中的External Object 和 Object

External Object 使用在xib中, Object使用在SB中。 External Object 只能通过 [[NSBundle mainBundle] loadNibNamed:@”PersonView” owner:self options:dict] 方法配置,具体配置方法如下:

1
2
3
4
5
6
7
8
9
10
11
1
2
3
4
5
6
7
8
9
10
11
//如下两个类必须值全局变量(external Object关联的类)
self.personHandler = [PersonHandler new];
self.sonHandler = [SonHandler new];
NSDictionary *para = @{
                       @"test":_personHandler,
                       @"son": _sonHandler,
                       };
NSDictionary *dict = @{
                       UINibExternalObjects:para
                       };
PersonView *p = [[NSBundle mainBundle] loadNibNamed:@"PersonView" owner:self options:dict].lastObject;

在xib中配置好external object 关联的类的class和 identifier之后就能将控件链接到此类中, 如果控件同事链接到了external Object类和控制器中, 那么但按钮事件触发是会同时调用。(可分别用来更新UI和实现业务逻辑)

Object只需要关联好类即可实现nsobject类和控件的关联

两种加载xib文件的性能对比

第一种:[[NSBundle mainBundle] loadNibNamed:@”DataExplainViewController” owner:self options:nil].lastObject;

第二种: UINib *uinib = [UINib nibWithNibName:@”DataExplainViewController” bundle:nil]; self.view = [uinib instantiateWithOwner:self options:nil].lastObject;

第一种加载方式是使用读取文件, 并没有将读取的信息缓存, 所以高频操作会有降低性能;

第二种加载方式将读取的文件缓存到了内存中。

判断运行环境

这些宏定义在如下位置,是模拟器或者真机系统里面的

1
2
3
4
5
#if TARGET_IPHONE_SIMULATOR
    NSString *rootPath = [[NSBundle mainBundle] objectForInfoDictionaryKey:@"projectPath"];
#else
    NSString *rootPath = [[NSBundle mainBundle] bundlePath];
#endif

取消某个控制器的左滑返回手势

1
2
3
4
5
6
7
8
9
- (void)viewWillAppear:(BOOL)animated {
    [super viewWillAppear: animated];
    self.navigationController.interactivePopGestureRecognizer.enabled = NO;
    
}
- (void)viewDidDisappear:(BOOL)animated{
    [super viewDidDisappear:animated];
    self.navigationController.interactivePopGestureRecognizer.enabled = YES;
}

将汉字转化成拼音

1
2
3
4
5
6
7
8
9
10
11
#pragma mark - 汉字转拼音
+ (NSString *)phoneticFromChinese:(NSString *)chinese {
    NSMutableString *phonetic = [chinese mutableCopy];
   //带声调
    CFStringTransform((__bridge CFMutableStringRef)phonetic, NULL, kCFStringTransformMandarinLatin, NO);
    //不带声调
    CFStringTransform((__bridge CFMutableStringRef)phonetic, NULL, kCFStringTransformStripCombiningMarks, NO);
    
    NSLog(@"%@", phonetic);
    return [[phonetic uppercaseString] substringToIndex:1];
}